By Charlie Smith, McElroy Metal,
www.mcelroymetal.com
In our first two articles, “Metal Roofs: Recover or Remove?” (Metal Roofing Oct./Nov. 2022) and “Panel Systems That Work Well for Metal Roof Retrofits and Recovers” (MR Feb./March 2023), we covered whether it is better to recover or remove and replace an existing metal roof that has reached its service life, as well as the types of standing seam roof systems that should be used to recover an existing sloped metal roof. In this article, we will cover some of the different ways to recover an existing sloped metal roof, whether it be on an open frame metal building or over a solid deck. As stated previously, when contemplating doing a recover, it is best practice to use a structural standing seam panel. We will begin with the most common type of recover scenario I get involved in: putting a new symmetrical standing seam on a metal building.
9 Recover Methods
There are at least nine ways to recover an existing metal roof on a metal building. These include Roof Hugger, Top Hat, Clip and Purlin, Zee Clip and Hat, Hat over hat spacer, hat over sliding hat, hat and scat, Grid, tall clip and infill with rigid insulation (where you attach the new roof to the purlins using long fasteners). On a metal building, there are several things that need to be established to help decide what is the best way to recover the roof. First you need to determine: What is the existing roof? Is it an exposed fastener R panel or Corrugated panel, or is it a standing seam? If it is a standing seam you need to know if it is installed with high floating or low floating clips. This is very important. This should be one of the first things you figure out because it will determine how you retrofit the roof.
The roof system you plan to use to recover the existing roof will need to meet the current wind and snow loads attached to the existing frame spacing. In order to calculate those pressures, you need the purlin spacing, the roof slope and the eave height. You will need to have some kind of drawing showing roof plan and elevation. If you or the owner are concerned about the additional weight added during reroofing, then you will need to measure purlin gauge, size, lap length over the rafter frames, bay spacing and how the purlins are attached to the rafter frames. As stated before, the Section 707 of the International Existing Building Code allows for the recover over an existing roof as long as it does not add more than 3 pounds per square foot to the structure. Pretty much all of these methods will weigh less than 3 pounds per square foot, unless you add a lot of iso or get involved in a grid system.
Exposed Fastener Roof System
Let’s start with options to recover an existing exposed fastener roof. In my opinion, the best way to recover an existing roof on a metal building is to use a Roof Hugger. A Roof Hugger is a 16- or 14-gauge purlin that is notched out to fit over the ribs of the existing roof on a metal building. There are a number of reasons I think it is the best system. First, it provides the most attachment back to the structure of any frame system used to recover an open-frame metal building. A Roof Hugger installed over an exposed-fastener roof on a metal building will increase the load carrying capacity of the purlin. A Top Hat will also have this effect. This is a very big deal. Roof Hugger has conducted a lot of modified base testing that includes a purlin lap as well as software modeling to determine exactly how much extra load the purlins will handle after installation of the Roof Hugger.
As I said in the first article, we saw an increase over 7 pounds per square foot of added capacity by using a 4 1/2” Roof Hugger on top of an R panel. Basically, we made the existing 8” purlin into a 12 1/2” purlin. There are a lot of buildings out there that will not meet the current design loads or are at the limit as they are. In many instances, installing a new roof with a Roof Hugger will not only give the owner a new watertight roof, but a structural upgrade at the same time. I have been on a lot of metal buildings where I felt like I was on a trampoline, then, after the retrofit, they felt completely different.
As far as insulation goes, you can infill between the two roofs with batt, EPS or iso. In most areas you can leave out the insulation and provide a ventilated air space between the roofs. This saves a lot of money and, in my experience, provides a very similar outcome as far as reducing the heat transfer into the buildings.
The biggest disadvantage of using a Roof Hugger is price. It is one of the more expensive ways to recover an existing metal roof on a metal building. Another disadvantage is that you will not get continuous insulation using a Roof Hugger.
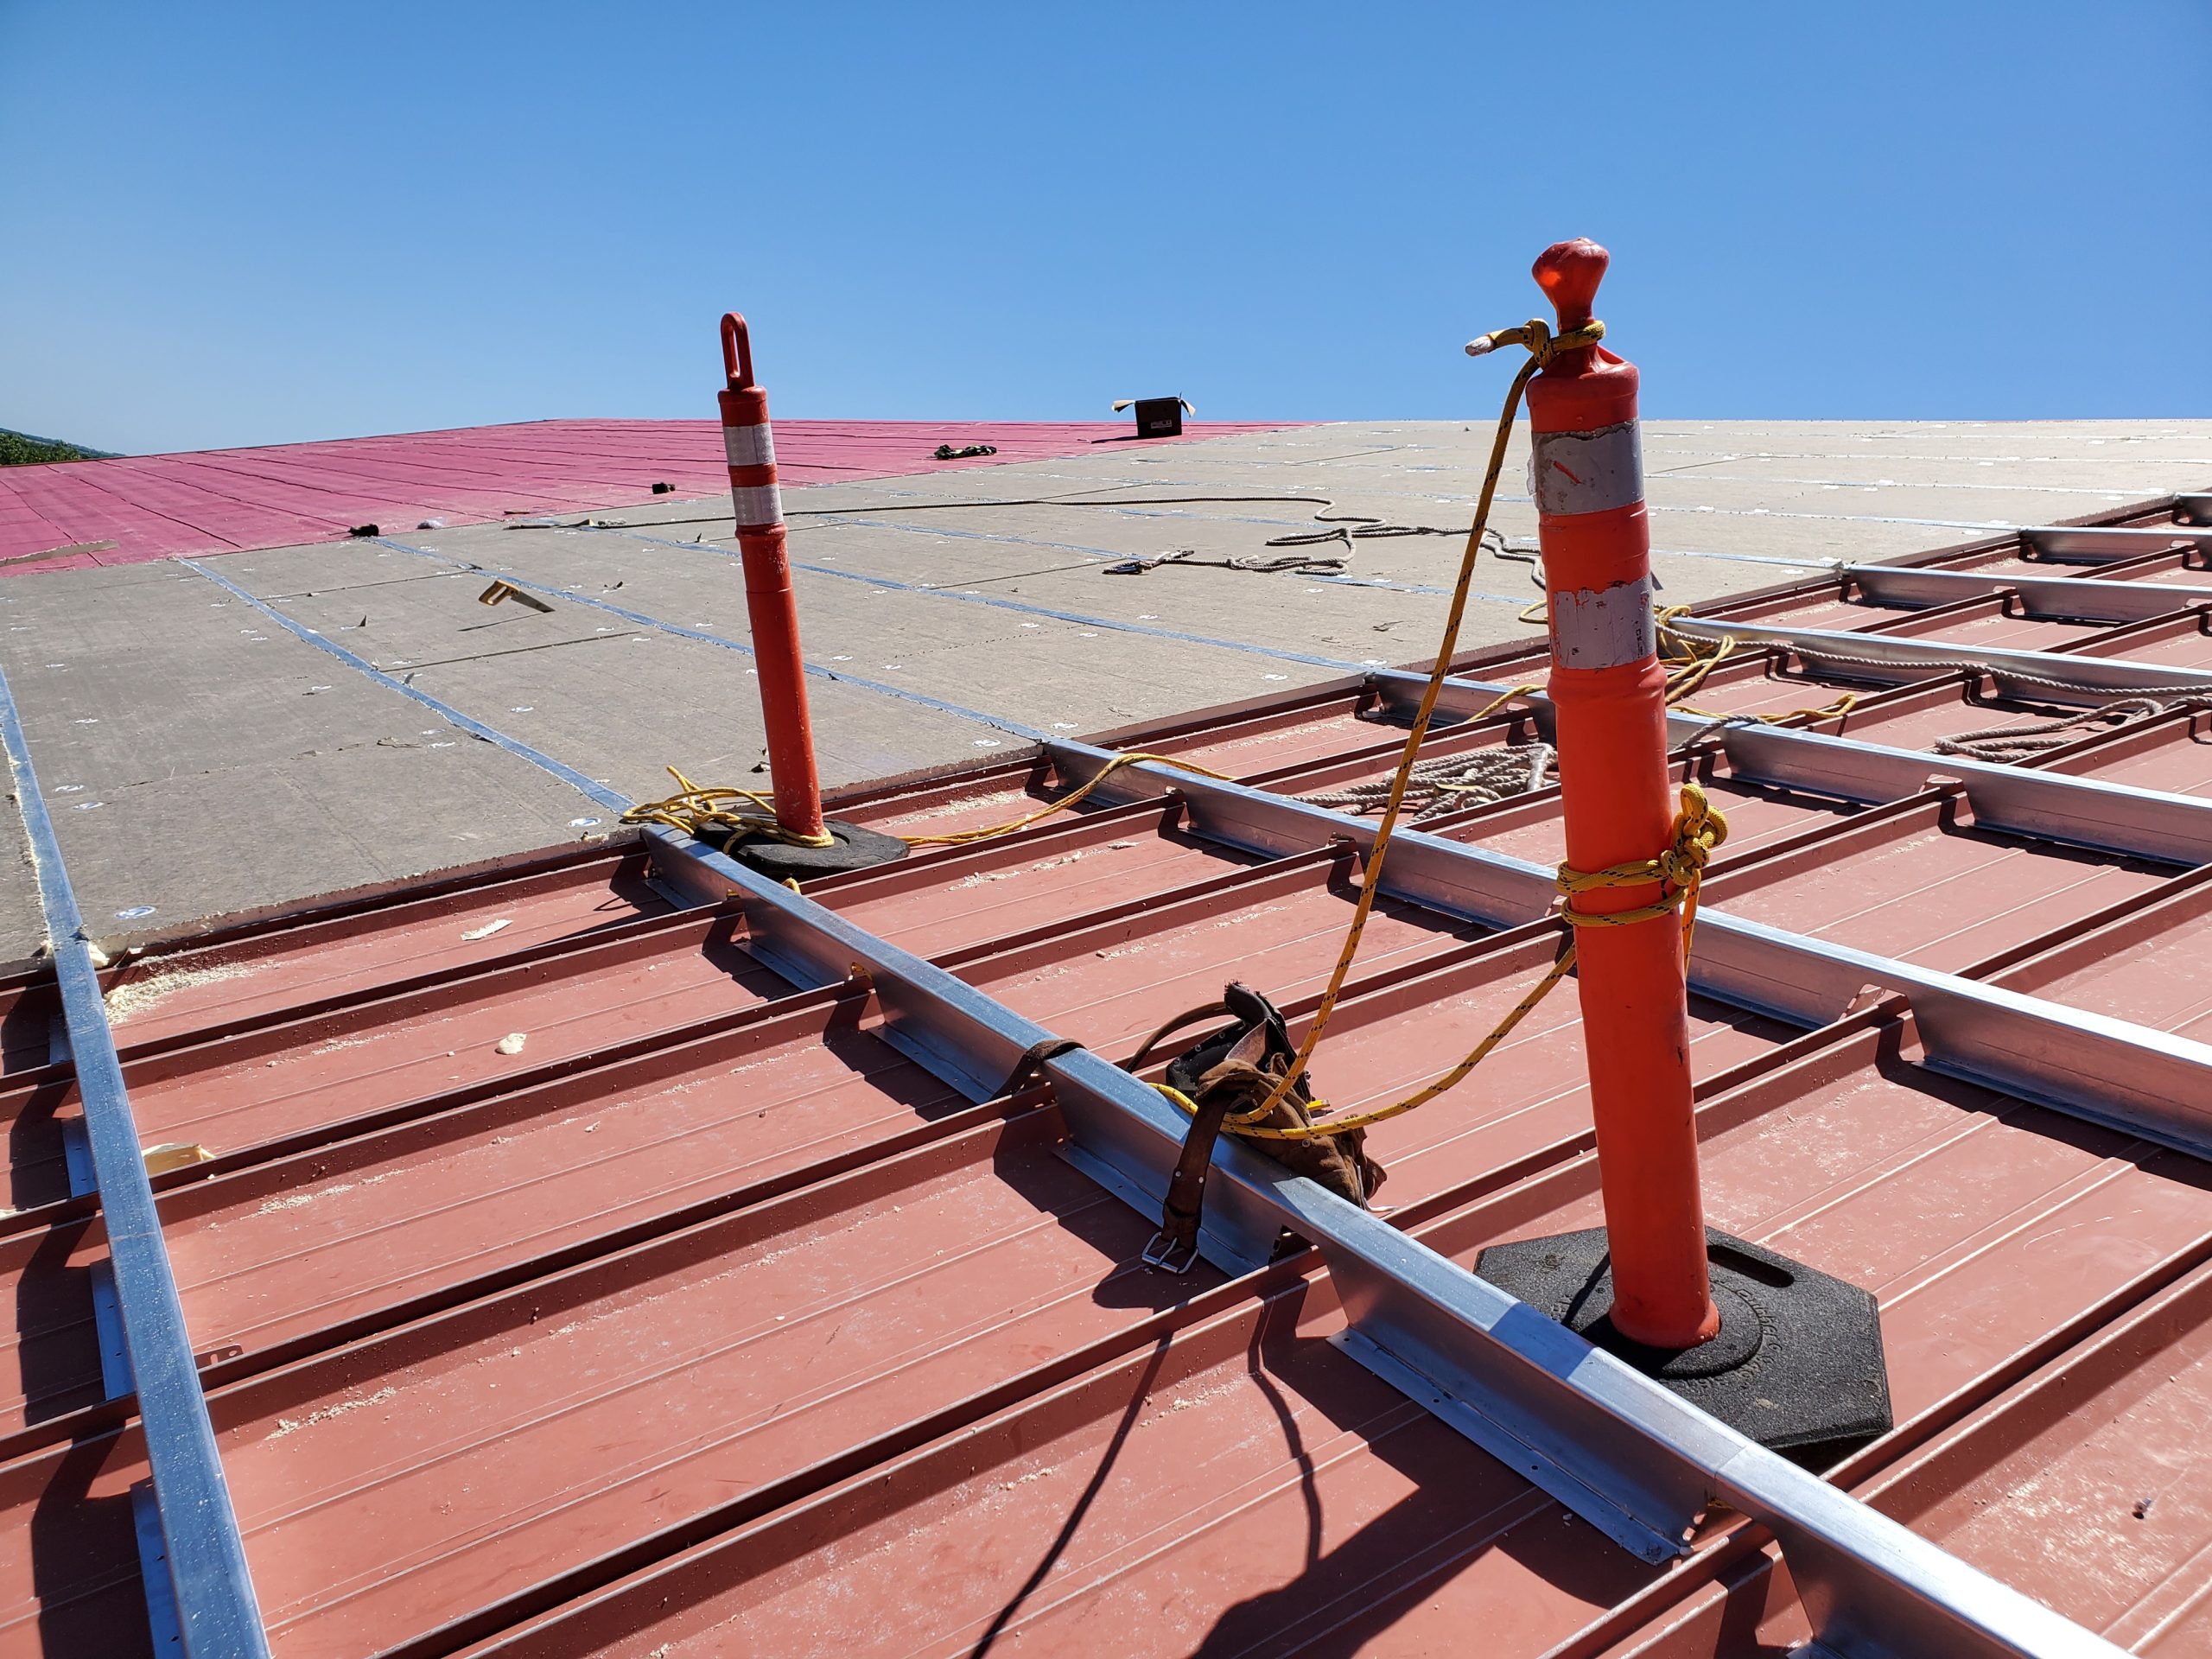
The clip and purlin, zee clip and hat, hat over hat spacer are all two-piece retrofit frame systems where the lower piece sits between the ribs of the existing roof panel and attaches to the purlin. Depending on the wind load, snow load and purlin spacing, the lower members are spaced anywhere from 12” to 48” on center along the purlin. A second member, either a continuous 16-gauge zee purlin or hat section is attached to the top of the lower members. This system costs much less than a notched purlin or Roof Hugger, especially if the engineering allows the lower members to be spaced at 48” on center.
Typically these systems are infilled with batt insulation, but provide the very best performance of the options to provide a ventilated air space between the two roofs. There is very little blocking the passage of air from eave to ridge. Any time you are using a frame system and want to insulate using an air space, you want to make sure you install either foam tape or thermal spacers between the panel and the new purlin or hat to make sure you don’t get any roof rumble, the noise that is made when the wind blows just right and the panels start vibrating on the purlins. It will drive everyone out of the building and result in a call from someone’s lawyer.
Individually, the clip and purlin system consists of a 12-gauge angle clip attached through to the existing purlin and a small 16-gauge purlin attached to the clip.
The advantages of the clip and purlin are cost and ease of creating a 6” high space if the owner wants to add 6” batt insulation between the two roofs. The disadvantages are you need to add a stabilizer every 10’-15’ and you are fastening the zee sideways into the 12-gauge clip.
The hat over zee clip and hat over hat spacer are very similar. In both cases you are fastening the hat section down into the top of the zee clip or hat spacer. The hat spacer is more stable than the zee clip, but costs a little more and may require 4 fasteners into the purlin. The zee clip is better used in areas of lower wind speeds and snow accumulation. All of these 2-piece systems are best if you want to use 6” of batt insulation.
A sliding hat base made the rounds a few years ago and it works really well if you want to retrofit using an exposed fastener R panel. The hats float back and forth as the R panel expands and contracts. I think it is a great system for lower budget jobs with no manufacturer warranty.
The “Hat and Scat” retrofit is a method used by the more dishonest contractors or contractors that don’t know better. This method involves installing a hat section on top of the ribs of the R panel and then attaching one side of the hat into the purlin and the other side into the R panel rib. The “scat” part is to get paid and scat out of there before the roof blows off because that is pretty much what is going to happen.
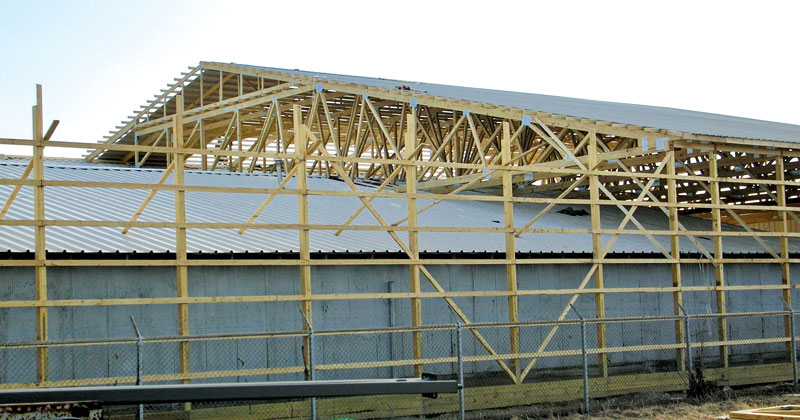
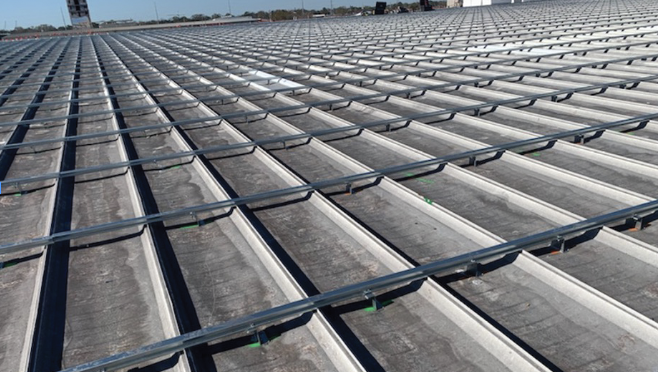
A grid system consists of purlins or hat sections that run up and down and attach through the old roof into the purlins. These new “rafters” are normally spaced no more that 4’ apart and connected together using hat section or purlins. These systems are used when the roof panel that you are planning to use will not meet the wind uplift at the existing purlin spacing. You can see here where a grid is used in the edge or corner zone because the new roof panel will not meet wind load.
This is why I use a symmetrical standing seam that incorporates continuous clips. Continuous clips eliminate additional corner framing in most instances.

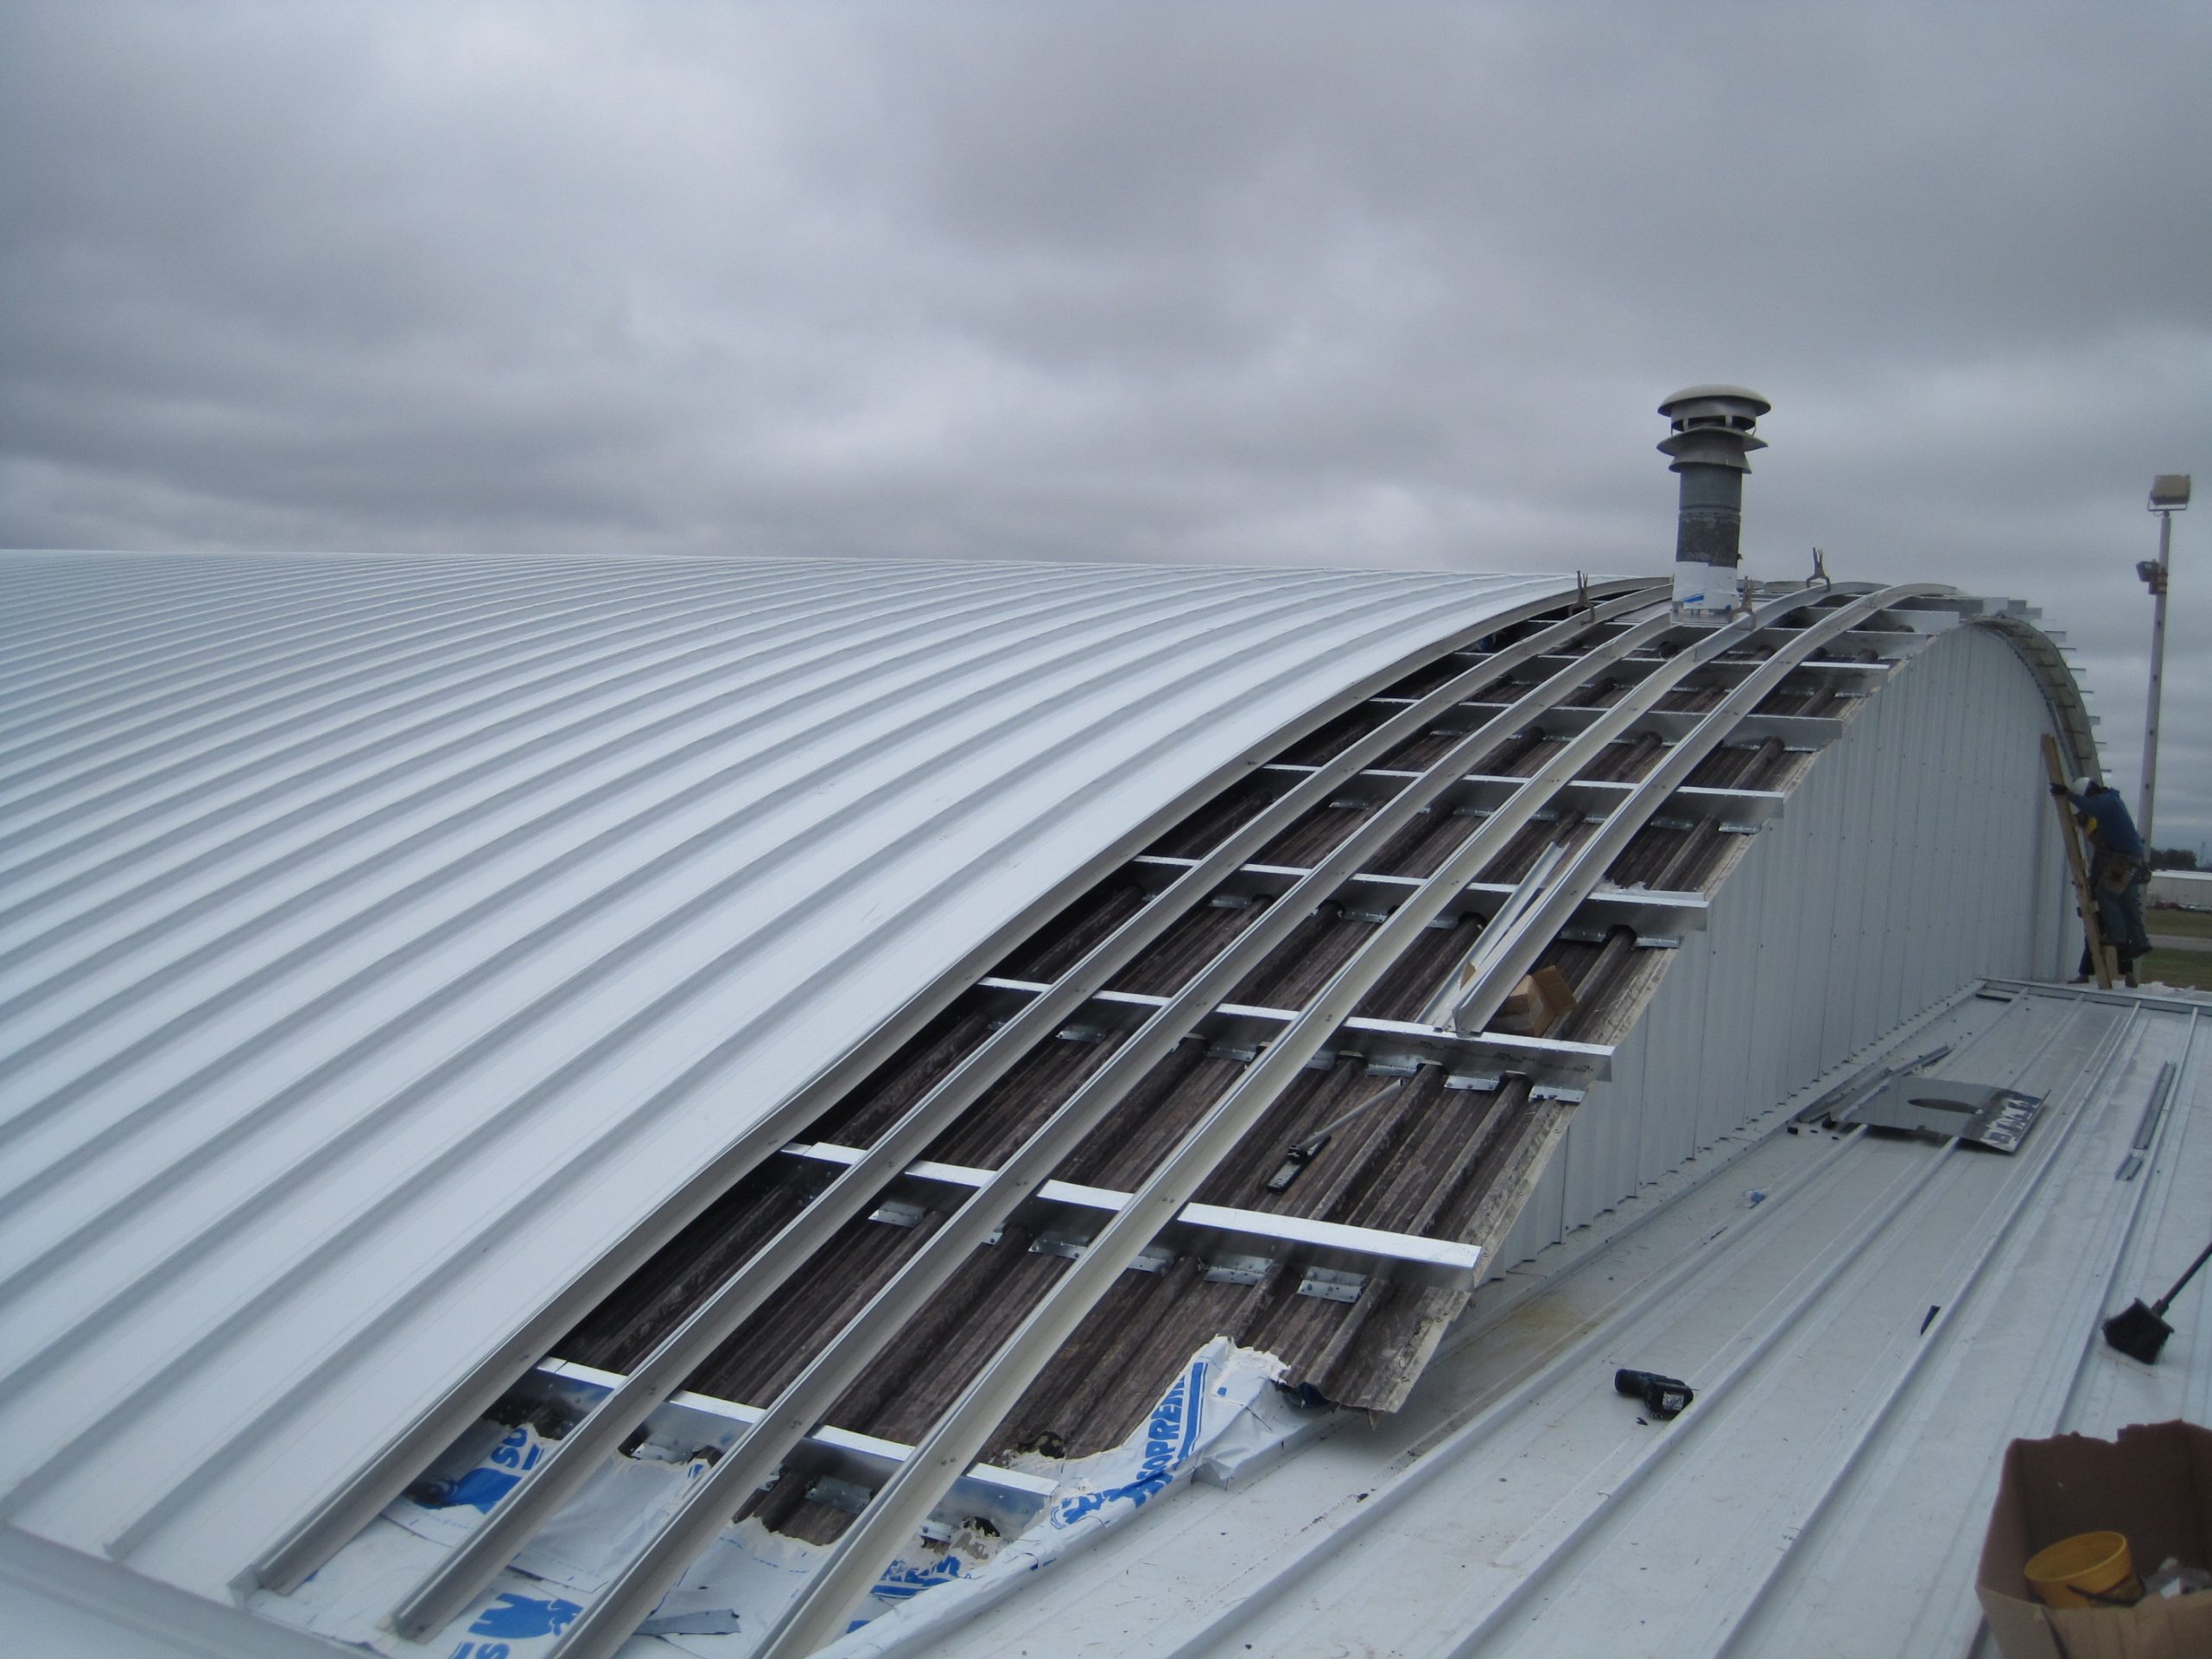
A tall clip is the fastest and most economical way to recover an R panel on a metal building. This involves using a 24” wide standing seam and attaching it directly to the purlins using clips that hold the new panel above the ribs of the R panel. The clip sits between the ribs of the R panel and should hold the panel up 1 ¾” to clear all of the fasteners and what not. These systems are normally insulated, but I have done a few with only an EPS flute fill board down the middle. It lowered the cost and worked great.
The last way to recover an exposed fastener on a metal building is to infill it with rigid insulation, which should be iso, then put down peel and stick, install the roof on top of the insulation and attach directly to the purlins using long fasteners. The advantages to this system are you get the best insulation coverage and you remain water tight during the whole process.
Corrugated Retrofit
If the existing roof is corrugated, you have a few choices to retrofit. Again, Roof Hugger has what I believe is the best system and it is called a Corru-Fit Hugger. This is a two-piece system that consists of a triangular shaped spacer that sits between in the low of the corrugation and a small zee purlin that connects the spacers. A long fastener is used to attach the zee purlin through the spacer into the purlin.
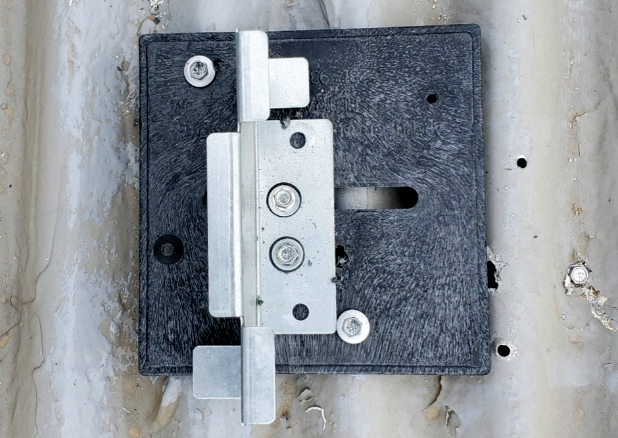
Another method is to install rigid insulation on top of the corrugation and attach the new roof to the purlins using long fasteners. I have also used a plastic shim plate under a clip on jobs where the corrugated panel was a heavier gauge, and we were not so concerned about crushing the ribs.
The last way to recover an existing corrugated panel is to use a hat spacer that sits down between the ribs of the corrugated panel with a hat section that runs across over the purlin. Here is a photo of a system promoted by Top Hat.
Standing Seam Retrofit
If the existing roof on a metal building is a standing seam, then you must determine if it is a low floating or high floating system. The best way to figure it out is to drill a hole in the panel right over the purlin about 2” away from the seam on the male side of the panel (so you do not hit the clip) and measure the distance between the panel and the top of the purlin. You can also measure from the underside. This dimension will be zero, 3/8” 1”, 1 3/8” or maybe 1 3/4”. Zero to 3/8” is a low-floating system and with that you can do any of the systems above for exposed fastener panels. If you use a Roof Hugger or Top Hat you can expect an increase in the load carrying capacity of the purlins. If the existing standing seam is a high floating system, the only system that is really designed for this application is a Model T roof hugger. The Model T uses special offset fasteners that maintain the distance between the panel and the purlin. The Model T also has an anti-rotation arm built in that attaches the Roof Hugger to the existing panel rib. This is very important because is keeps the hugger from rocking back and forth since it is not in compression against the purlin below. Also, the Model T only adds weight to the roof, not any structural enhancement.
Solid Deck Retrofit
If the existing roof is on a solid deck, there is no need for a frame. The best way to recover these jobs is by infilling with iso, maybe an HD iso board on top of the flute fill, ice and water shield and a new roof attached all the way down to the deck. MR