Warmth, accumulated snowflakes and metal roofs can be a dangerous combination. Metal roofs have very smooth surfaces that don’t absorb water. As heat from an attic or sunlight starts warming up a roof, masses of snow and ice can slide off these slick surfaces.
The resulting avalanches can be deadly. At the very least they can damage property and make it difficult for owners to access entryways. This is where the need for snow retention systems becomes crystal clear.
“No matter the pitch of the roof, if we’re dealing with a metal roof in a location that can get snow, then snow retention is needed for safety,” says Lars Walberg, president of Rocky Mountain Snow Guards. “It can be snow fences, snow bars or snow guards. Or a combination of the three. However, the slickness of metal roofs means responsible roofers should be strongly recommending snow retention systems to their customers.”
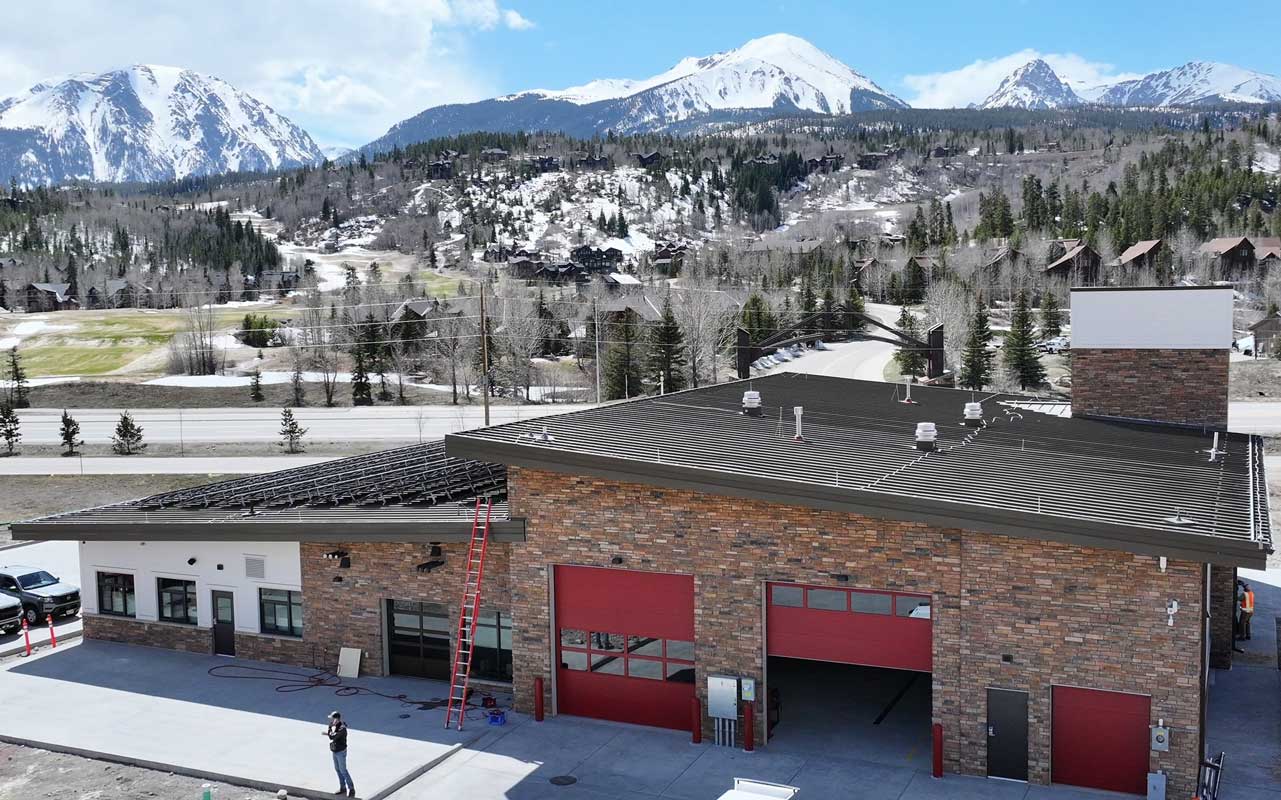
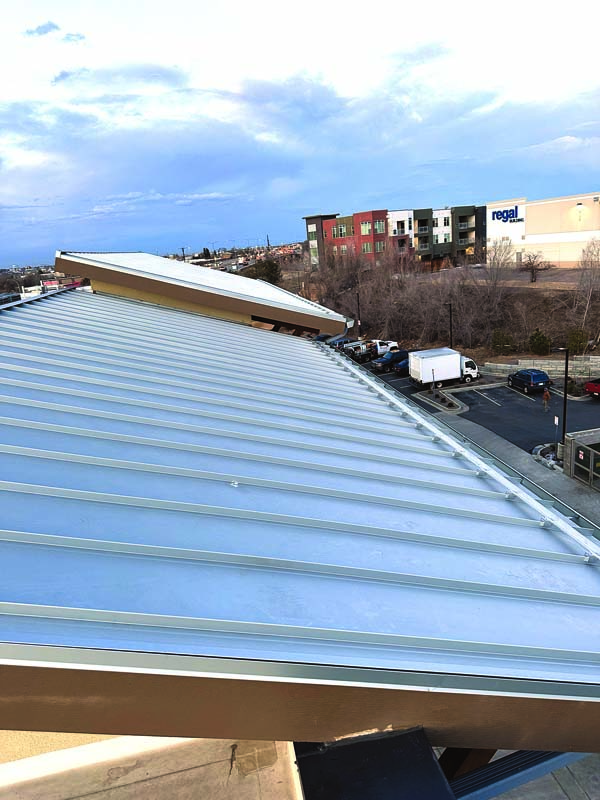
Silverthorne Station in Silverthorne, Colorado. Photo courtesy of Rocky Mountain Snow Guards
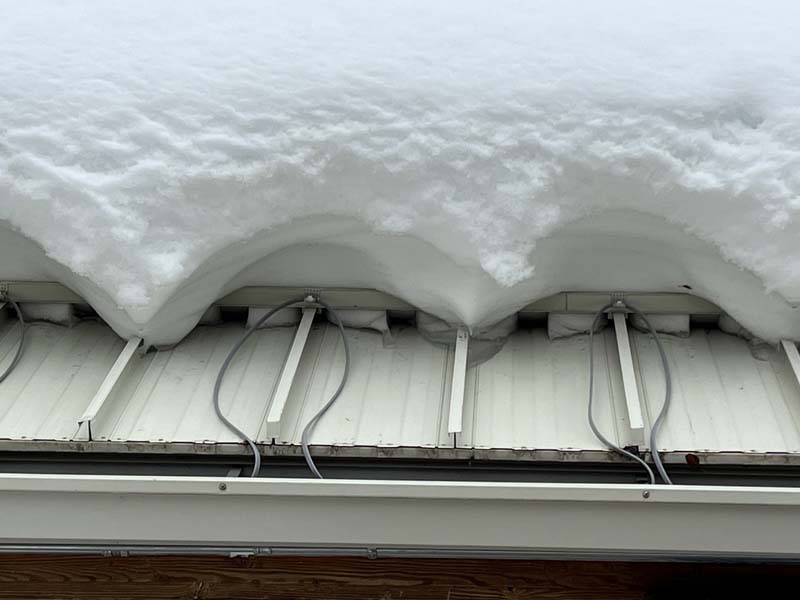
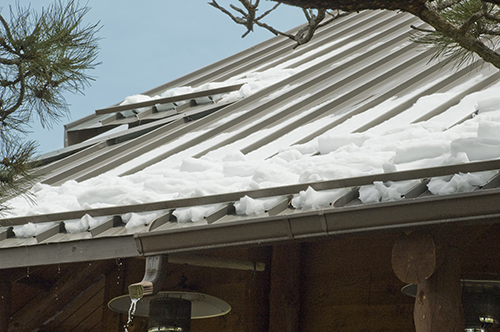
A combination of snow guards and snow fence keep heavy snow from falling to the ground below. Photo courtesy of Rocky Mountain Snow Guards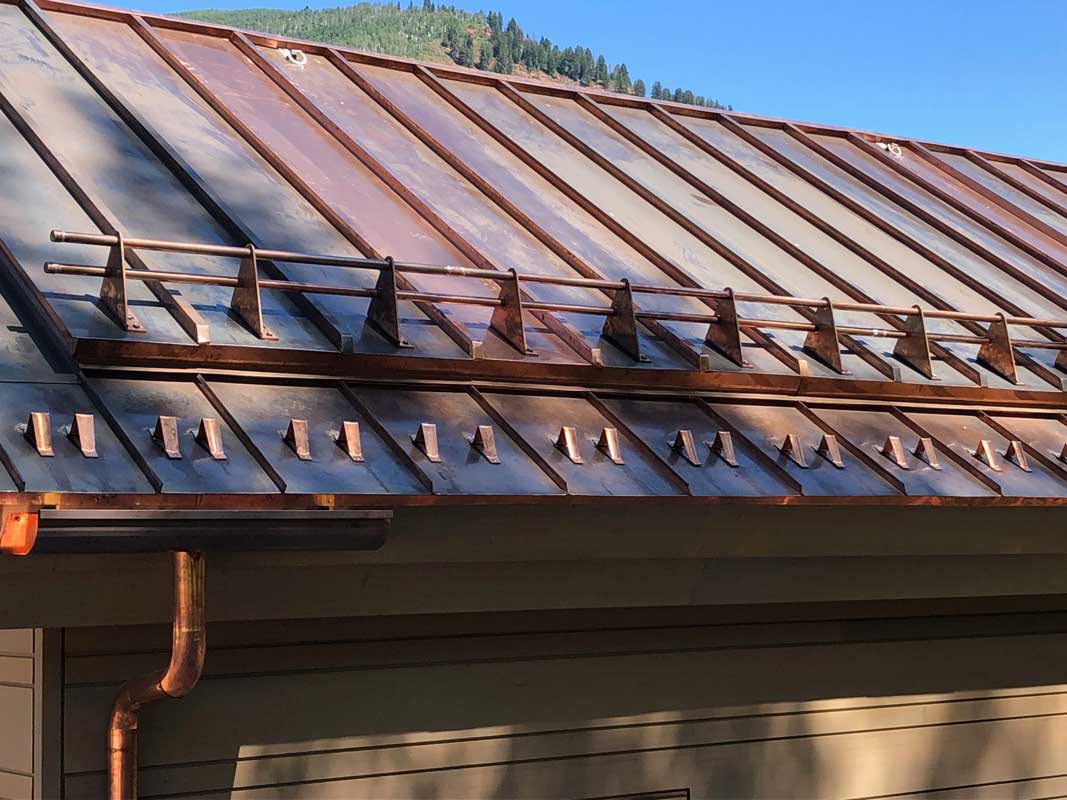
A combination of discontinuous and continuous snow retention. Photo courtesy of Rocky Mountain Snow Guards
Metal Roof for Fire Station
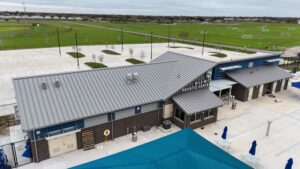
Harpel Builders out of Denver understands the need for snow retention systems. The company installs almost a dozen a year on their metal roofing projects and sees that number growing. Recently they installed an 18-inch wide New Tech Machinery SS 200 2-inch mechanical double lock medium bronze standing seam metal roof with some additional smaller Carlisle TPO roof sections on the new Summit Fire & EMS fire station in Silverthorne, Colorado.
“The roof design we received simply called for ‘a snow retention system’ but didn’t have a particular product specified,” says Nicholas Scatuorchio, president of Harpel Builders. “In situations like this, we send the plans to Rocky Mountain Snow Guards to have their experts review them and make snow retention recommendations. We use this free service often and they always make the process trouble-free.”
Snow Retention System at Silverthorne
For Station 10 in Silverthorne, the experts recommended to install a S-5!® ColorGard Bar-Style Punched Clamp-to-Seam snow retention system for safety on and around the fire house that also has dozens of solar panels on its roof. Attached to the metal standing seam roofs with S-5!® V clamps, the system uses a Color Strip in medium bronze inserted into the front slot of the ColorGard crossmember to complement the color of the roof.
“The S-5! Systems are hands down my favorite type of snow retention product to use on standing seam metal roofs,” says Scatuorchio. “They are the strongest imaginable, and we don’t have any issues with them ripping off like other systems.”
To impede the migration of snow and ice beneath the crossmembers, the team at Harpel Builders installed more than 10 dozen S-5!® SnoClip III for the ColorGard snow retention system. “Installation went great for all the products,” says Scatuorchio. “The SnoClips are installed every 16 inches on center, one per every panel. This ensures uniformity for the snow retention.
“Overall, these are very easy products to install and look great on the roof. Most importantly, I believe they will be very successful for this fire station structure in helping prevent snow avalanching from the roof.”
For the project, heat tape was added to the gutters and seams to add another layer of melting support for snow and ice. Finally, lightning protection wiring was attached to the entire perimeter of the roof.
Tips for Safely Installing Snow Guards
It’s not just about creating safe roofs with snow retention systems. It’s also about roofers staying safe. The team at Rocky Mountain Snow Guards, which this year launched the first-ever National Snow Guards Safety Month in March, recommends these practices for roofing contractors to safely install snow guards:
Tip #1: Oftentimes snow guards are required to be installed within three feet of the eave. Depending on the property, it may be safer to work off a ladder or lift versus being on the roof for the installation.
Tip #2: Always, always tie off the ladder at the eave and make sure the base of the ladder is secure. Never set a ladder so there’s just a foot or so above the eave edge. The ladder should be positioned high enough above the eave to allow enough space to get on and off it as safely as possible.
Tip #3: Follow all standard roof safety procedures. Don’t take shortcuts. Use tie-offs and other safety equipment.
Tip #4: Make sure the roof surface is snow-, water- and frost-free. Wet roofs are slippery roofs. This also means snow retention systems should not be installed during or immediately following a snowstorm. Roofers should not work on snowy, frosty or wet roofs.
Tip #5: For retrofit installation, put the snow guard in place, then tap the Woodbinder® screw into the strap on a Yeti or SnowTrapper (or any other snow guard with a strap that isn’t pre-drilled) with a hammer or mallet prior to drilling. This keeps the Woodbinder screw stable during the actual drilling.
Tip #6:Mark the locations for snow guard placement on the roof before beginning installation. This can speed up the installation, keep you focused and eliminate a sloppy placement appearance.
Tip #7:Always follow the snow guard manufacturer’s suggested layout. Many roofers assume they know the best pattern for snow guards. However, often what they know is different than the tested and proven layouts that the manufacturers recommend. MR